Nothing interesting here, just boring leak fixing, feel free to skip.
I was aware of two leaks (leaky areas) on the boat, one was in the starboard cabin lockers, most likely caused by the chainplates, the other was overhead in the cabin hatches. So I decided to fix these before Kathy gets back, 1, because they are very messy jobs, and 2, because I would be doing a lot of cursing as I worked through these tasks and I’m best left alone at times like this.
The chainplates are basically steel bars very securely bolted to the boats hull, the wire shrouds and stays holding the mast up are fixed to these, and it’s important they are in good condition, otherwise the mast might fall over. In actual fact, the design of this boat, a cutter sloop, means I have 11 stays holding the mast up, so the failure of one might not be as bad as on other non cutter rigs. The plates go through the deck, and because the mast is constantly tugging at them, the seal between the plate and the deck eventually fails, and lets water in. This isnt really a failure, more a fact of life on boats, the nature of the problem means that these will fail, and should be resealed on a regular basis. It’s not much different to how old wooden boats would need the seams recaulking every so often.
The chain plates on this boat were replaced about 8 years ago, the original steel used might not have been the best, hopefully the replacements are better. I can’t see them completely, but the plates look to be in good condition, however I need to pull all 8 of them out, when I get a chance and give them a proper inspection. Probably when I have to take the mast down I will do this.
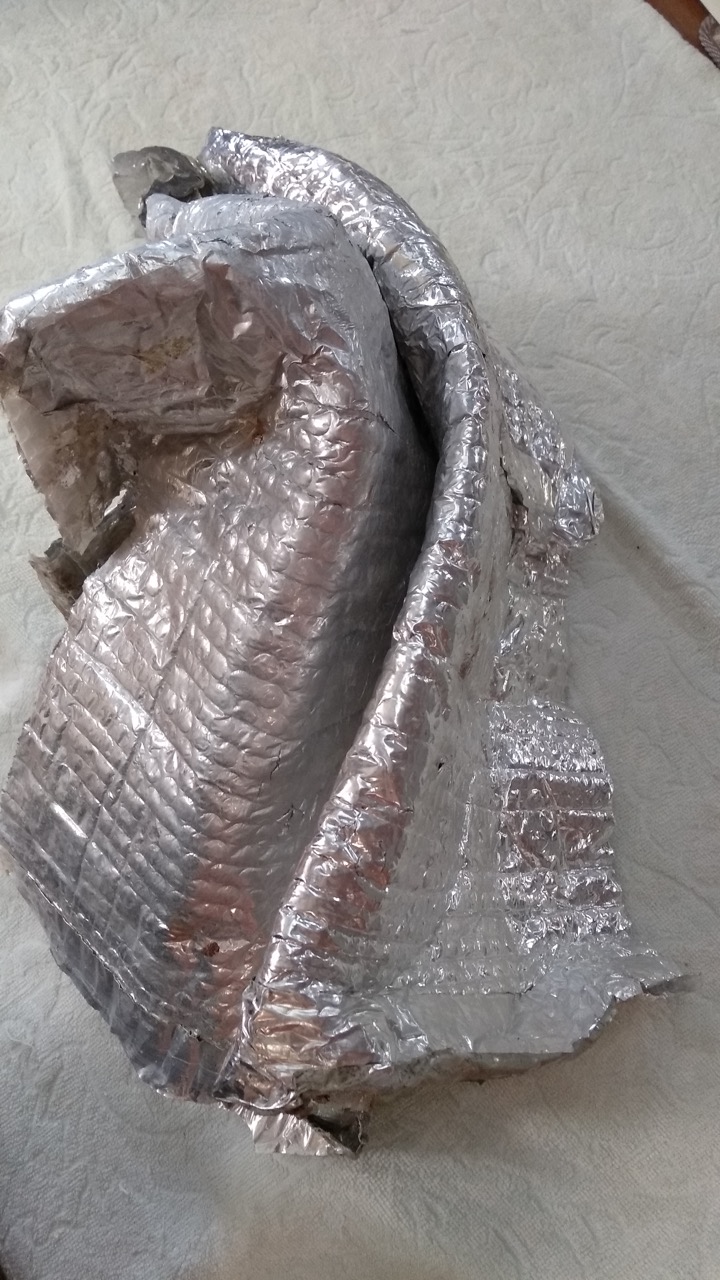
In the meantime, I’m replacing the sealing so that the water stops coming in and the lockers can dry out. Below you can see the locker is lined with a silver foil, this was supposed to keep the heat out from outside, but of course it only works on radiated heat, being a foil, and there’s not a lot of that in a locker. What it is good at is hiding problems.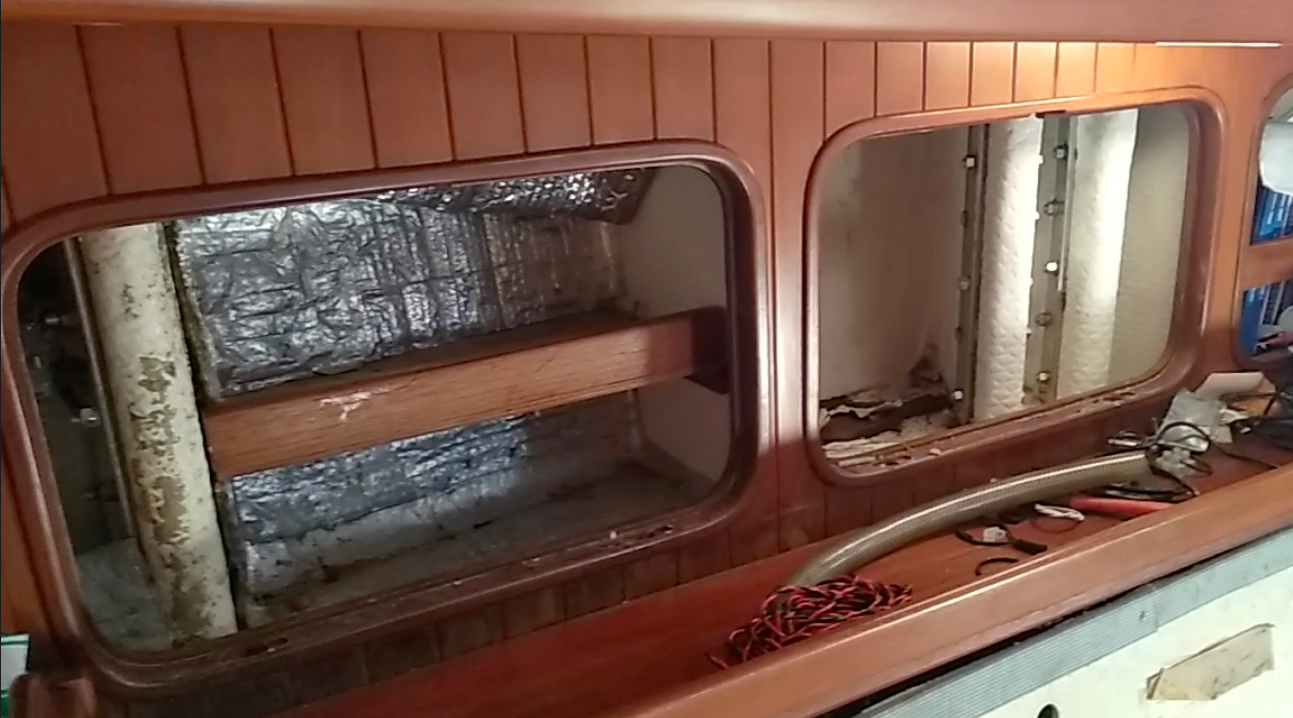
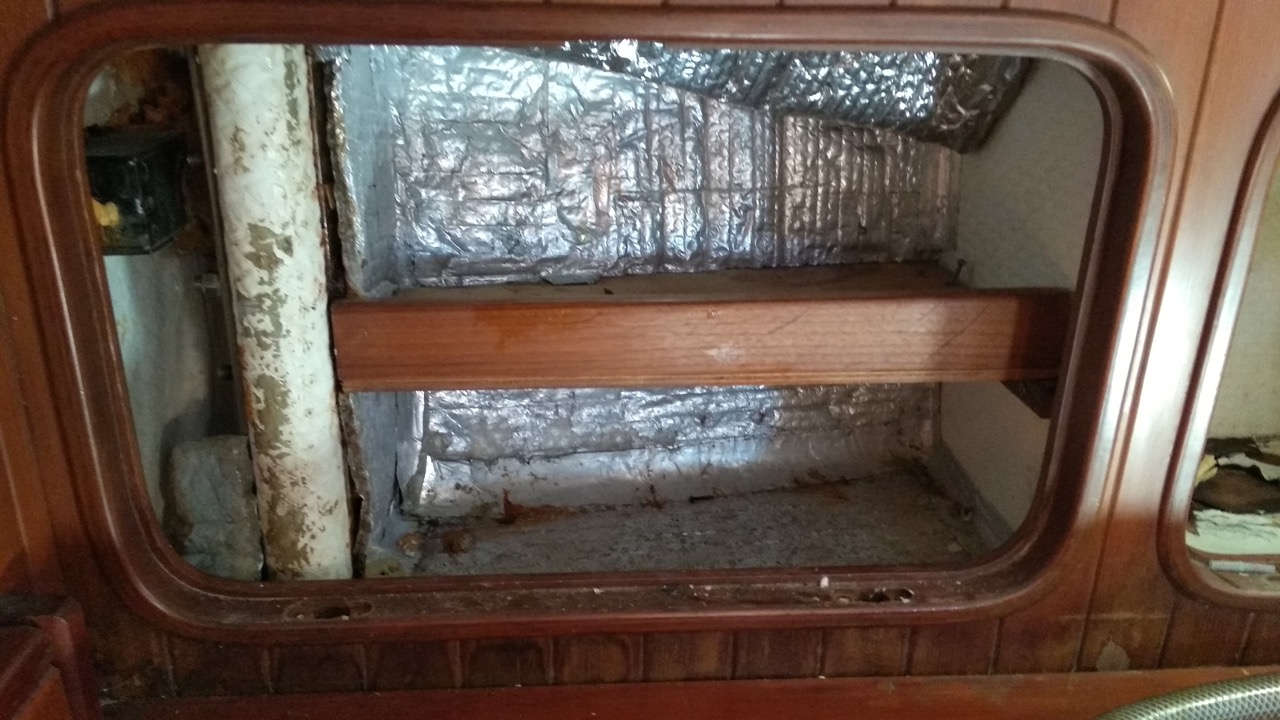
With the foil gone, the rust and damage becomes clearer. Fortunately the rust is on the backing plate, not the chain plate, the bolt will need to be replaced.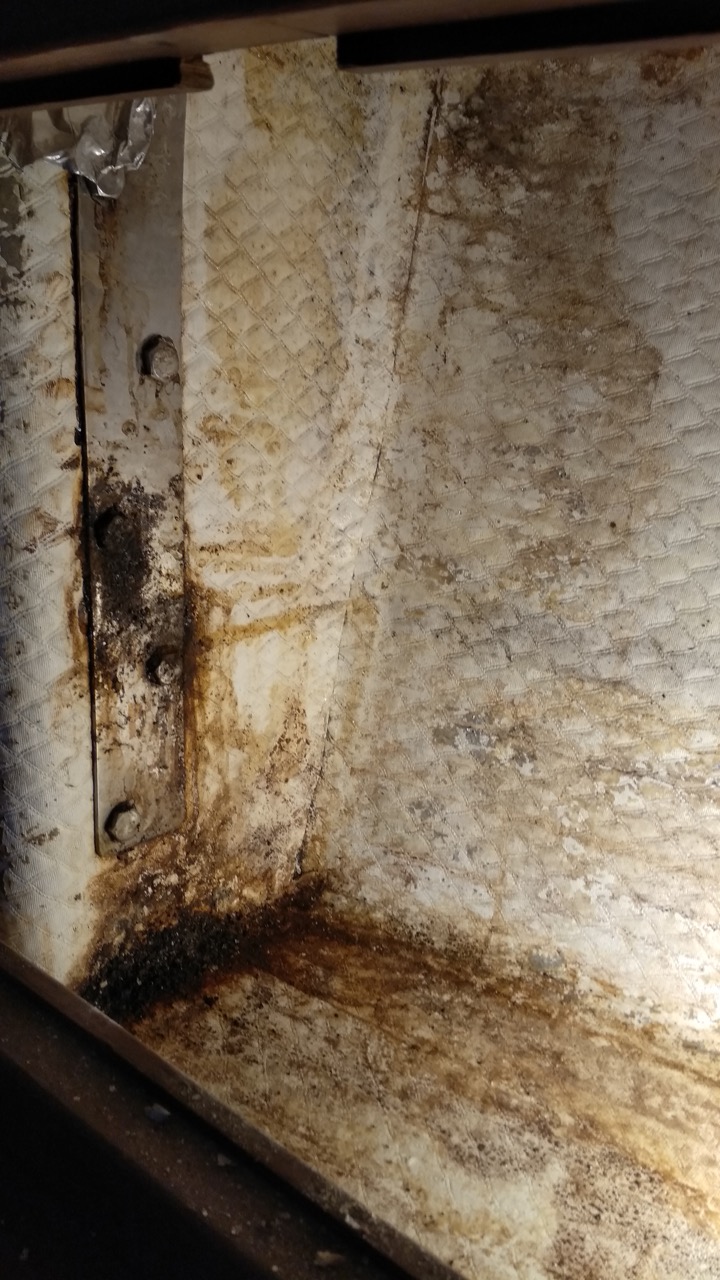
Beind the foil, the voids have been injected with expanding polystyrene, again I think to reduce the heat transfer, this would work, but it also allows for any water that does get through the deck to stay trapped and do damage. Ths explains the rust stains under the cap rail, where the water couldnt escape. On top of this the void under the cap rail is filled with foam and encases lots of electrical wiring. All of this I have to remove by poking, scratching, scraping, all while my neck is twisted one way, my body the other, and I’m bent backwards to reach the void. A little cursing may have occurred at this point.
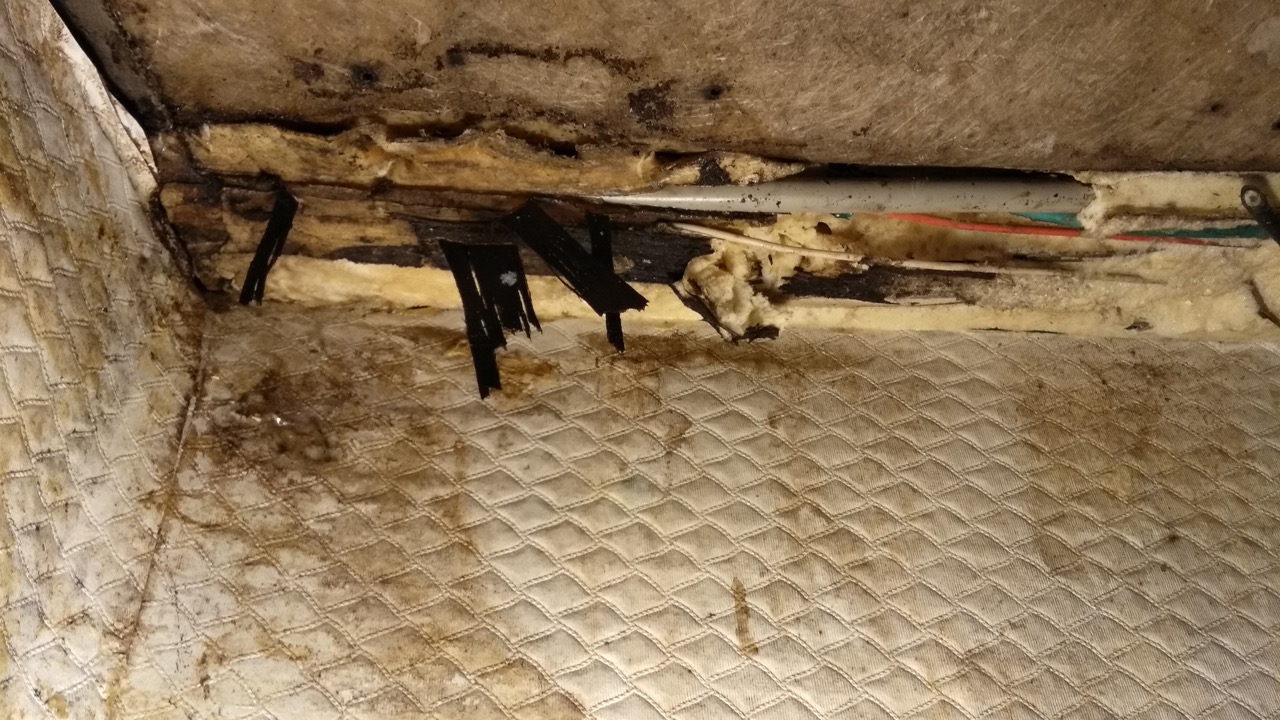
This is the rotted plywood headlining in the lockers that had to be removed.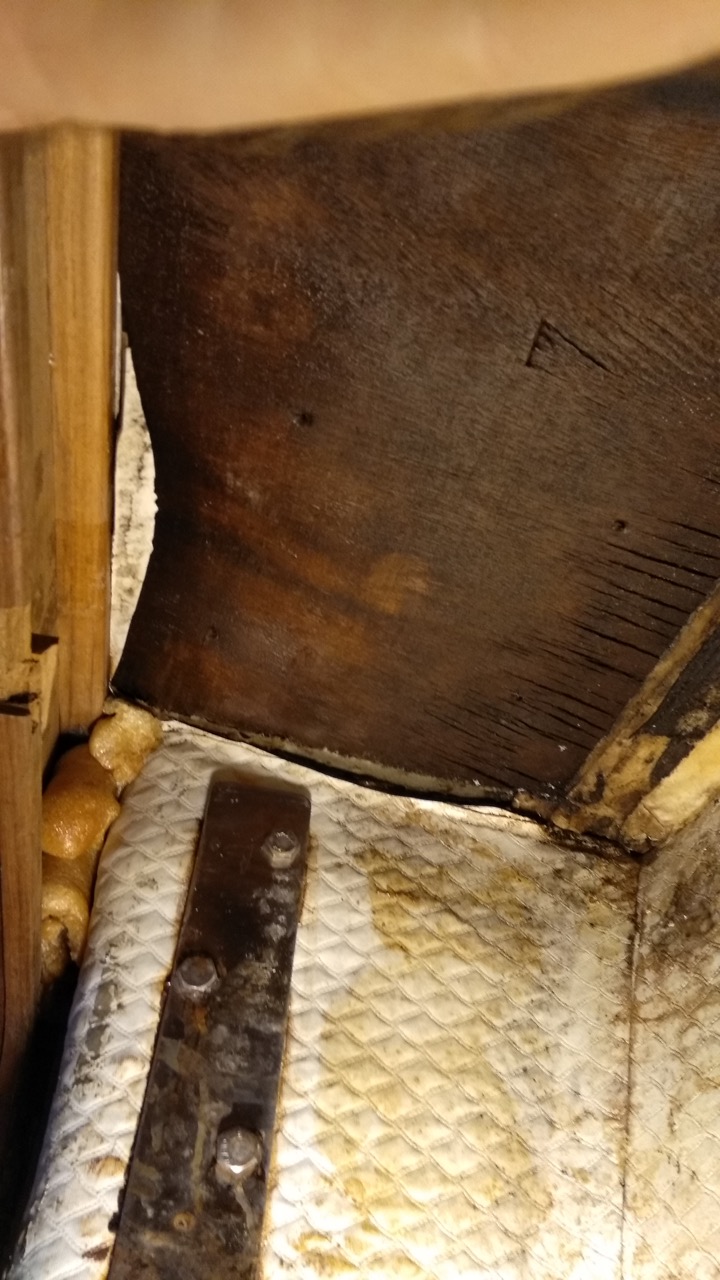 Eventually all the foil, foam, lining and rotted wood was removed. The the sealant was replaced. Before I did this I ran a hosepipe over the area and could clearly see the water coming in on each of the 4 chain plates, before I couldn’t see this as it was trapped in the foam, but spread around over time.
It’s looking a lot better now, just bare fiberglass in the lockers, but in a few weeks time, when I’m sure the leaks are fixed, I will refurbish the lockers properly and have them looking smart again.
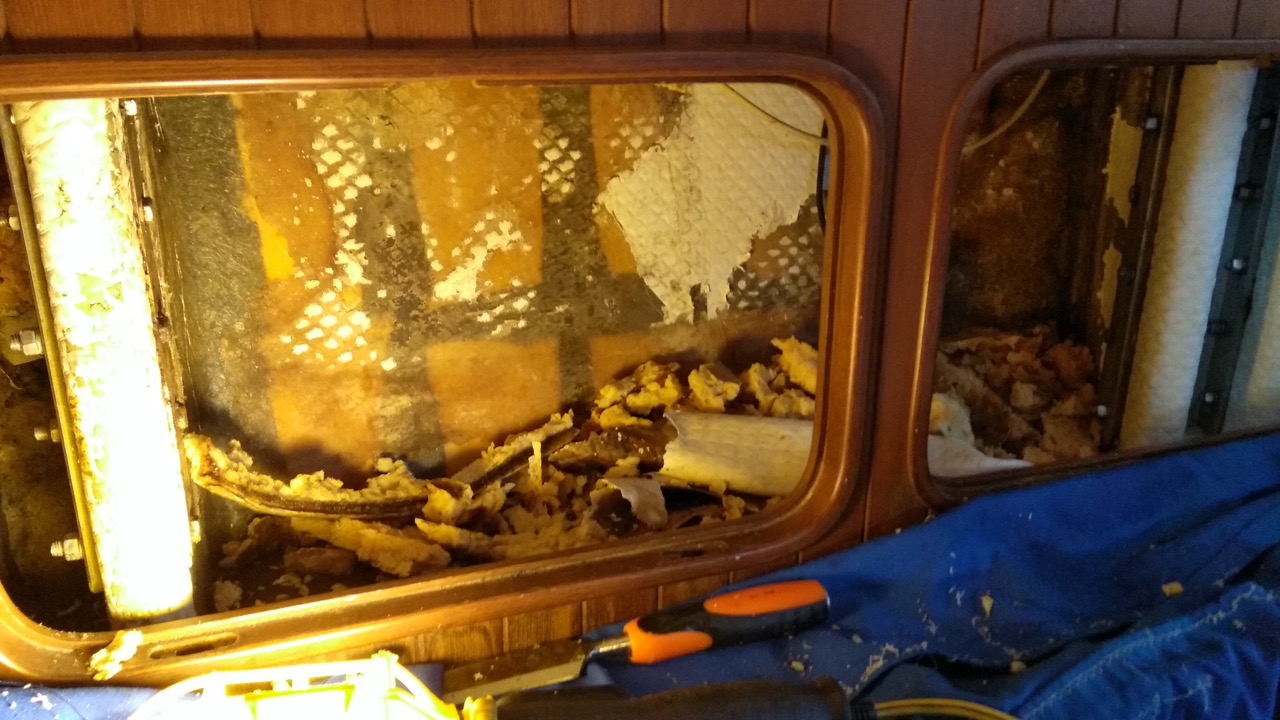
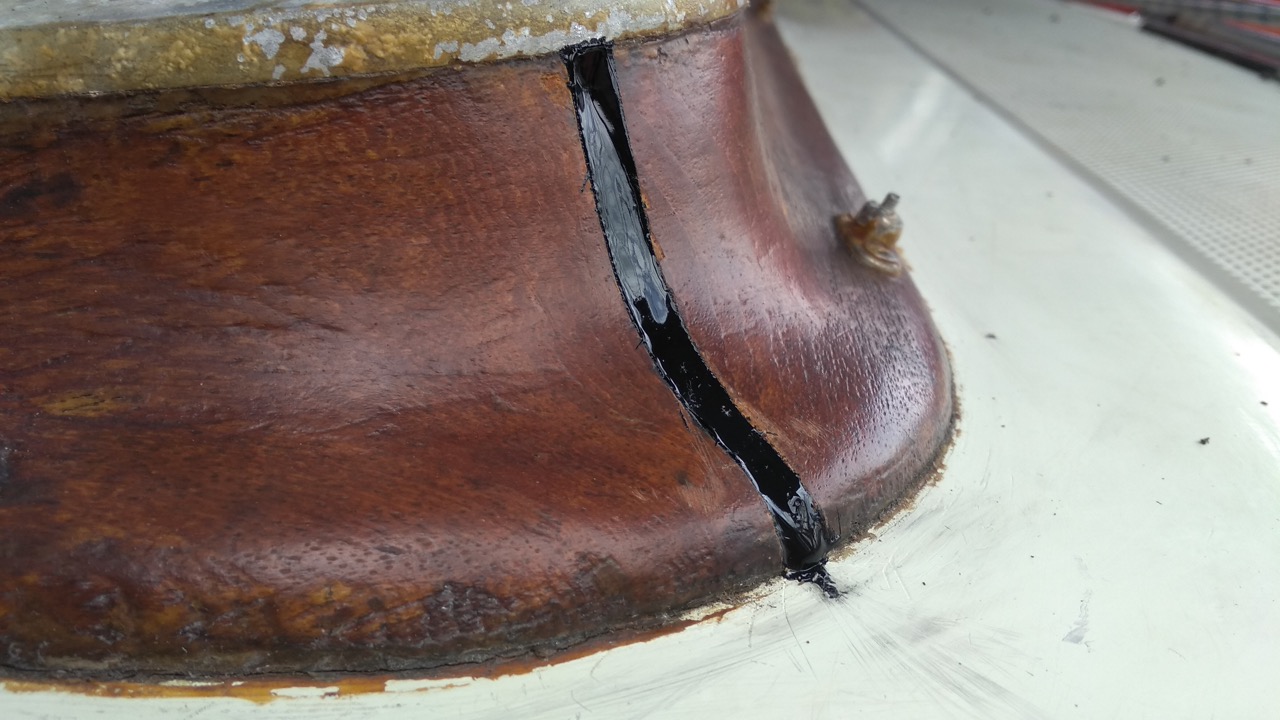
Next the hatches in the main cabin. These hatches are mounted on teak bases, which, I think, give it a touch of class. 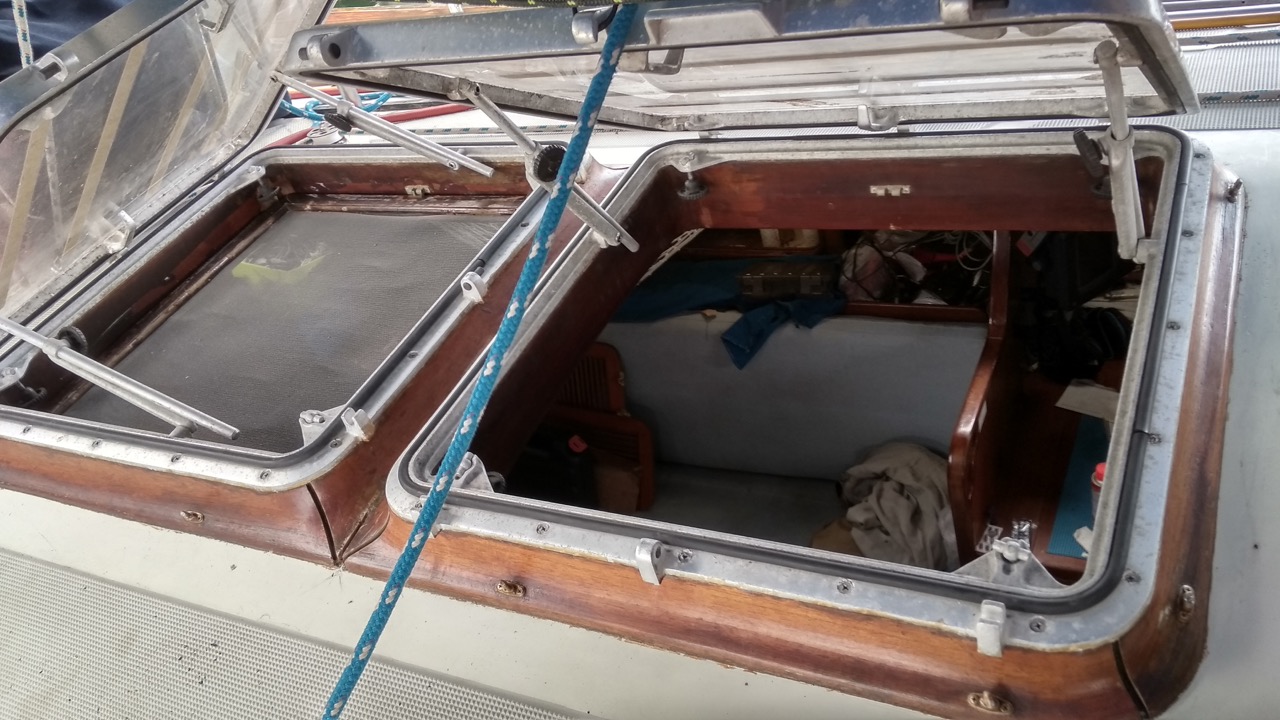 However the teak bases are made of 4 pieces, one on each side, and joined at the corners, and sealed with caulking, this is what I think has failed and is an easy fix. I have a special multimaster machine, made by the German firm Fein, which has a special fitting designed just for this job of cutting out the old caulking. Here you can see the results, and you can also see the gap underneath where the caulking sits that was leaking.
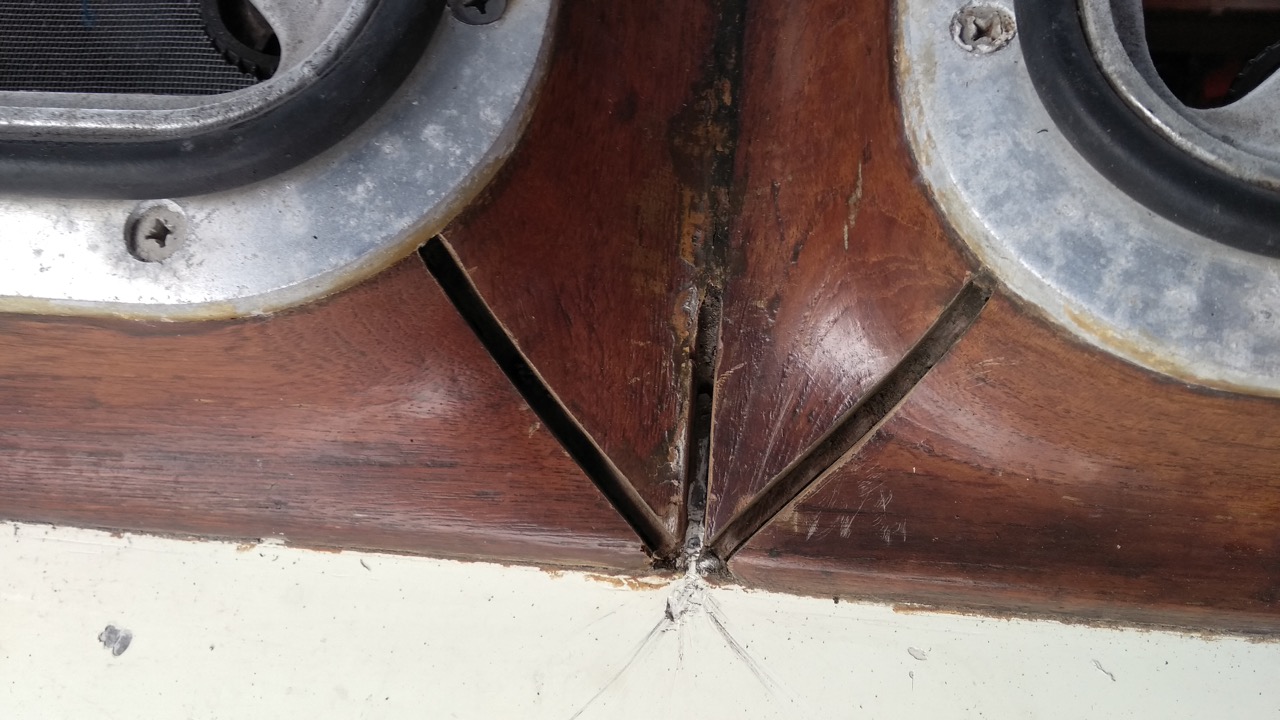
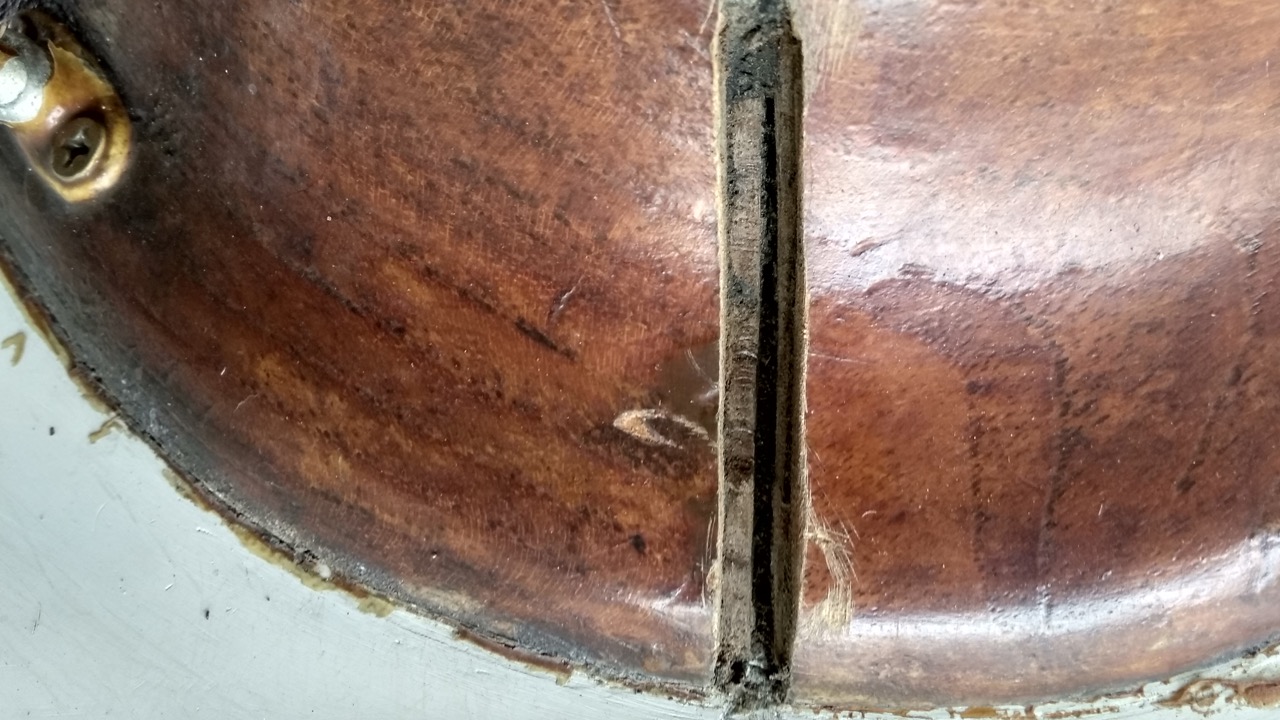
Once the bulk of the caulking is cut out, all remnants of the old caulk must be removed, then the area completely degreased with acetone, teak is naturally a greasy wood, and this grease stops the new caulk sticking to it.
I should have also used a primer, but none was available, so I hope the cleaning was enough. Now I had a tube of the best caulking, Sikaflex 290DC, but I had used it 3 months ago and it was probably off, despite only using a small amount. So I cut the tube in half and found caulk that hadnt gone off yet and was able to use that. I’m getting a lot better applying caulk with a gun/nozzle these days, but this required a spoon to extract the caulk, adding a new dimension to the job. The caulk has the consistency of very thick treacle, it’s very very sticky, and has “skin homing” and “target avoidance” systems built in. So using the spoon technique was never going to be easy. 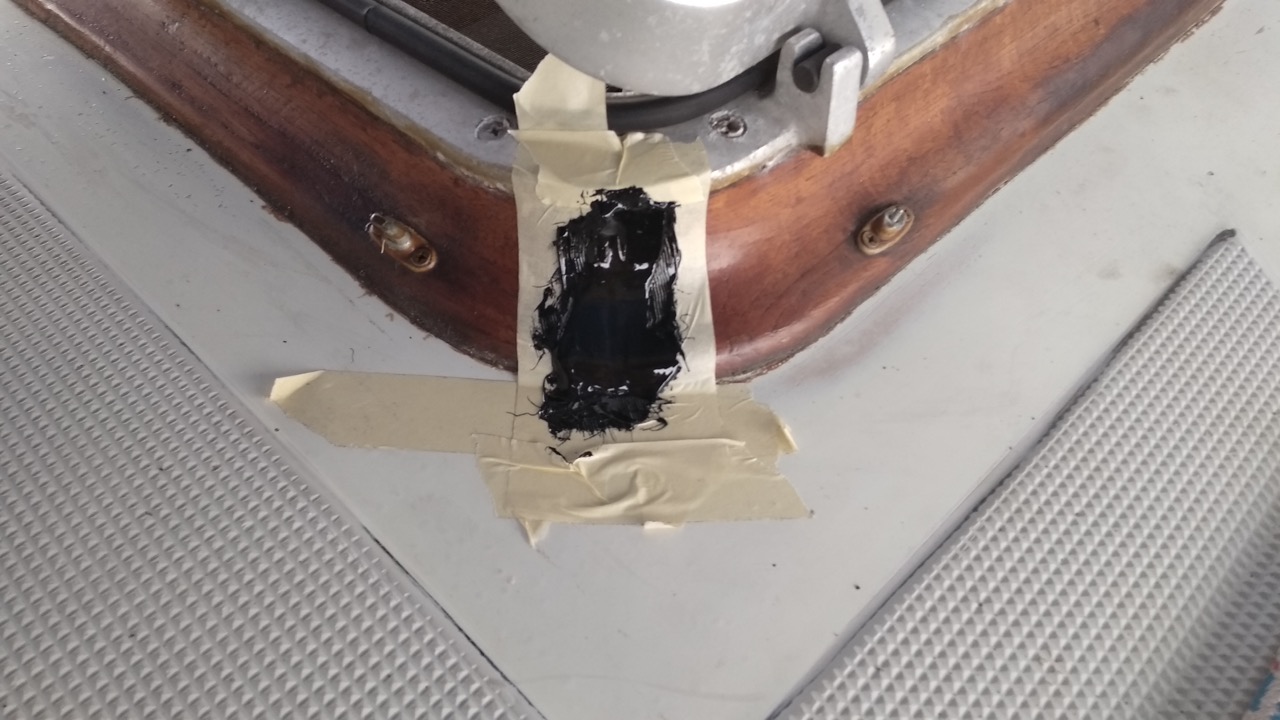
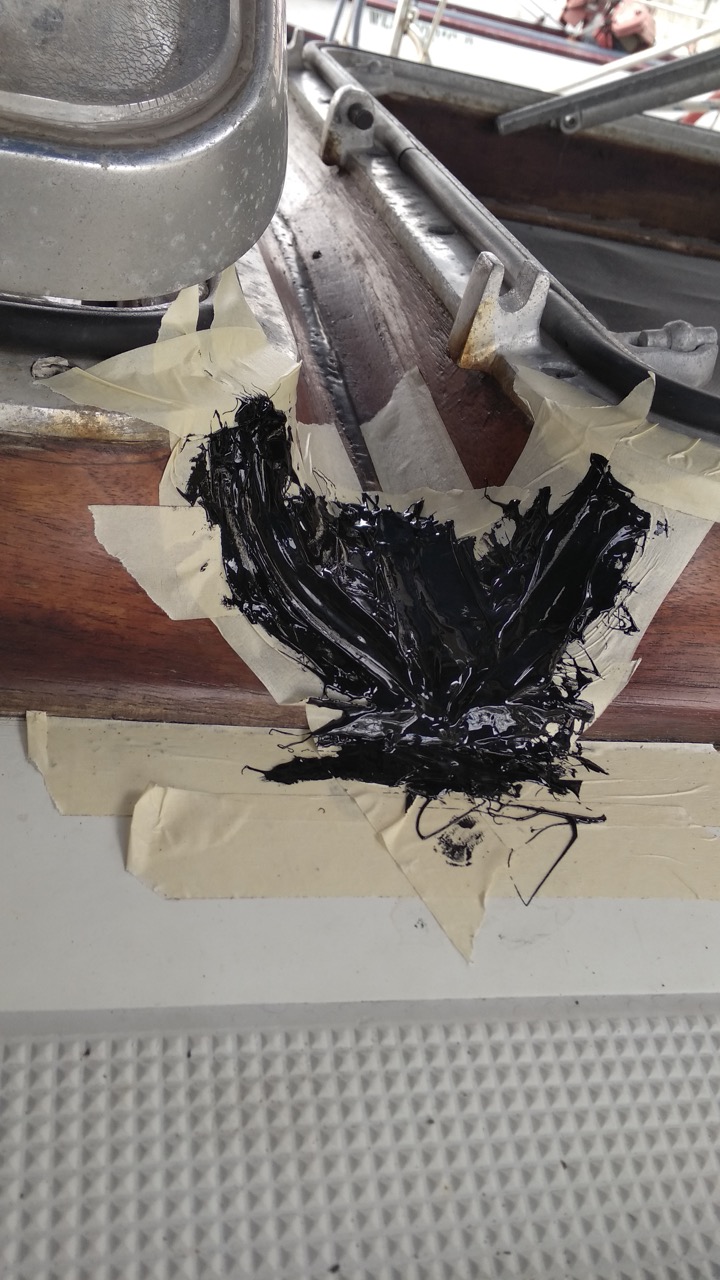 The trick with caulking is to get the stuff on quickly, and then get the masking tape off pretty quickly too, before it develops a skin. I thought I could fill all 10 seams then be back for the first before it skinned, but I was a bit slow, and ended up rushing and getting gunk in the wrong places. However, I can tidy this up once it has set, as I will be sanding down the wood a re-varnishing soon.
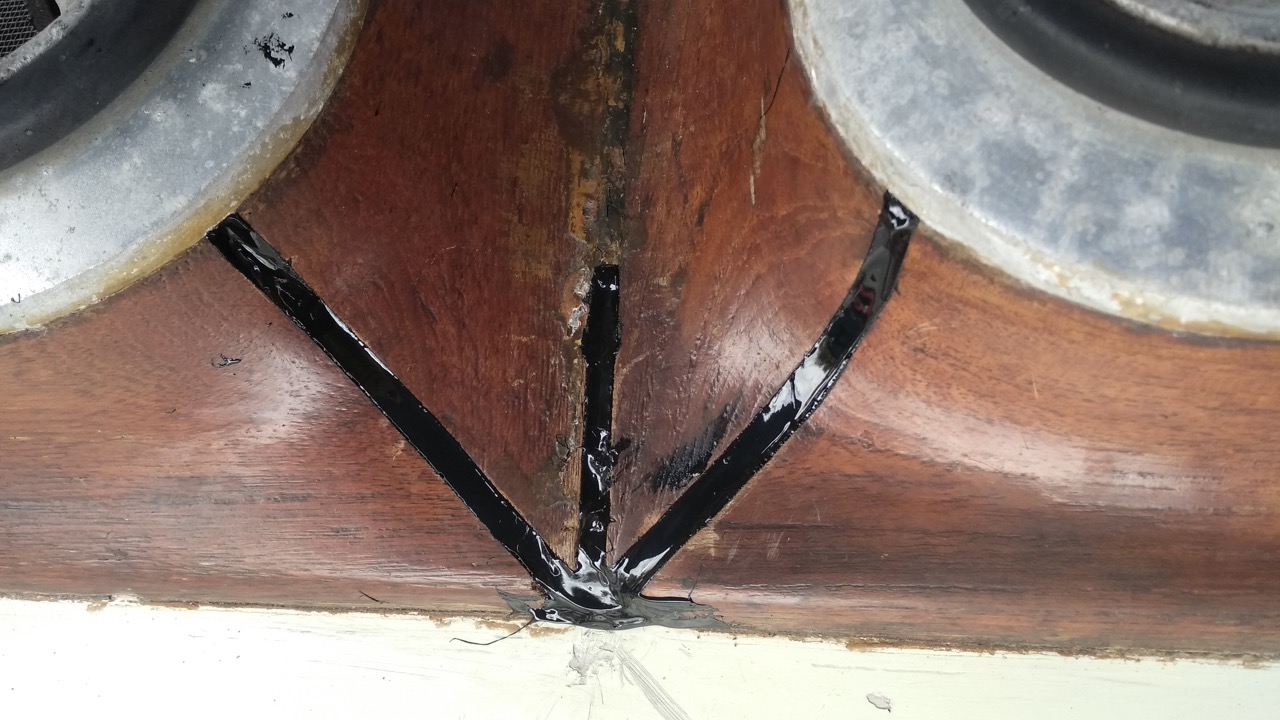
It’s not easy caulking on near vertical surfaces, thankfully the caulk only ran out a little.
I’m hopeful that this problem is sorted for another decade or so.
Paul Collister
Using same Sikaflex 290 today myself at least I have a nozzle, horrid stuff to clean up I noticed.
Yes, it’s nasty stuff alright, but it works really well, used loads on my last boat, very tenacious, I think the primer really helps too.
Lots of Kitchen roll, bin bags, disposable gloves and an acetone soaked rag helps. Would be nice to see some pictures of your boat and your work on her.